Seen and Safe: The Solo November Light Check for Darker Commutes
November has a habit of making ordinary driving feel like a night shift. You leave in gloom, come home in it, and every unlit cyclist, wheelie bin and damp patch of road seems to arrive out of nowhere. That is exactly why a quick bulb check now is worth more than a heroic emergency session in a rainy Halfords car park later.
You do not need a helper, a diagnostic machine or a thermos of tea. You need ten minutes, a flat surface and a bit of patience. Here is how to run the check properly, spot the stuff that is easy to miss and work out whether you are looking at a simple swap or a job for someone with a ramp and a mug that says World's Okayest Mechanic.
Start with the obvious: lights are not optional
Before we get into the practical stuff, a quick legal reality check. In the UK, your lights have to be in working order and the right colour. Headlamps should be white or yellow. Rear lights should be red. Indicators should be amber. You should not have white light showing to the rear except when you are reversing, and you should not have red light showing to the front. Fancy colour bulbs might look brilliant on a screenshot from a car meet, but they are a fast route to an MOT fail, a chat with Plod and an insurance conversation you do not want.
Brightness matters too, but not in the way many drivers assume. The rule is not simply “brighter is better”. Your headlamps need to be aimed correctly so you can see without blinding everyone coming the other way. A bulb that is technically working but throwing light into the treetops is not doing you any favours.
The solo walkaround, bulb by bulb
Park facing a wall, garage door or big shop window. This is the cheap trick that replaces a mate stood at the back of the car saying “still nothing” while you flick switches. The reflection gives you a rear view without needing to grow a second head.
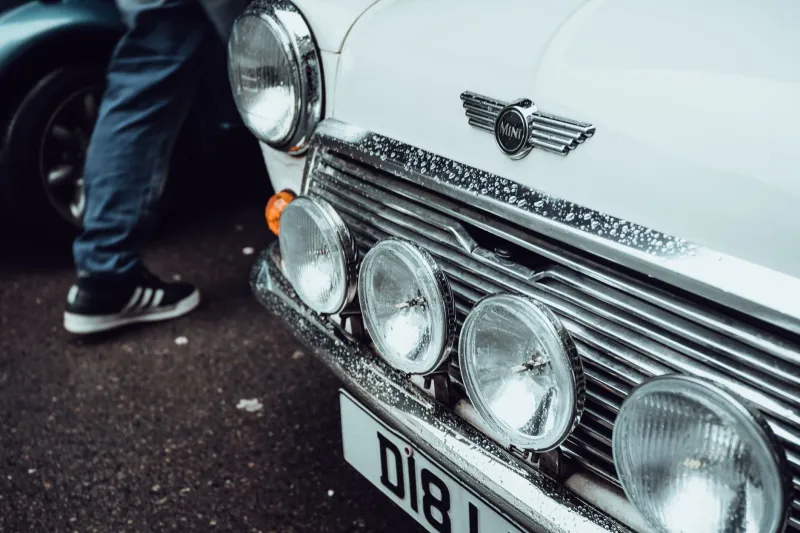
Start at the front. Put the sidelights on first. Walk round and look at both sides. Then dip beam. Then main beam, if you are somewhere you can safely use it for a second. Check the colour match. If one side looks creamy and the other looks like a blue-white searchlight, you have a mismatched pair. Even if both work, that mismatch is annoying for other drivers and usually a sign someone replaced one bulb in a hurry.
Next, indicators. Hit the hazard switch so all four corners flash at once. Walk round slowly. Do not just check the front and rear clusters. Check the side repeaters on the wings or mirrors too. They are small, they get ignored and they are absolutely part of the legal picture.
Now the rear. With the reflection trick, you can usually see the tail lights and brake lights. For brake lights, you need the pedal pressed. If you are on your own, wedge something long and soft against the pedal and the seat base. A broom handle wrapped in a cloth works. So does a carefully placed bit of timber. Just do not use anything that could slip and jam the pedal down while you are behind the car. Common sense applies.
Reverse lamps are the awkward ones. They only come on with the ignition on and the gearbox in reverse. If your car has a manual box, make sure the handbrake is firmly on, the engine is off if you prefer, and the car is not going anywhere. Then check the reflection. If you cannot see them, ask yourself whether the bulb is actually out or whether the reverse switch is playing up. A dead reverse lamp can be as simple as a bulb, but it can also be a switch or wiring issue.
Look at the lens, not just the light
A bulb can be working perfectly and still be useless because the headlamp lens has gone cloudy. Plastic headlights oxidise. They go yellow, milky and dull, and the light scatters instead of hitting the road. At this time of year you notice it most on unlit A-roads and country lanes.
Run your hand over the lens. If it feels rough, or if it looks foggy from the outside, a headlight restoration kit might wake it up. These kits are a bit like polishing a dull paintwork panel: they work best when the cloudiness is on the surface and you follow the instructions properly. If the lens is badly crazed, cracked or foggy from the inside, replacement or a professional repair is the better shout. Do not attack a modern headlamp with a kitchen scourer and optimism.
While you are there, check the rear clusters for condensation. A bit of mist that clears is one thing. Standing water inside the unit is a problem waiting to corrode contacts and kill bulbs.
Five-minute fix or garage job?
Some bulbs are beautifully simple. Pop the bonnet, twist a holder, swap the bulb, done. Rear cluster bulbs are often accessible from inside the boot behind a trim panel. Side repeaters vary wildly, but many are straightforward. Check your handbook before you start yanking plastic. If the handbook says the front bumper needs to come off to change a fog lamp, believe it.
Modern cars have made some bulb swaps needlessly dramatic. Bumper removal, sealed LED units, modules that need coding, and CANbus systems that throw a warning because the replacement bulb draws a slightly different current. If you fit an LED where a filament bulb used to live, the car may flash, throw a dash warning or fail to recognise the bulb. That is not always a fault with the bulb; it is the car being fussy about what it expects to see.
My straight-talking view on upgrade bulbs and LED retrofits: be careful. A quality, road-legal halogen upgrade bulb with the correct fitment and approval marks can be a sensible improvement. A no-name LED retrofit that claims to be brighter than the sun and comes with a free keyring is usually a bad idea. It can fail an MOT, dazzle other drivers, upset the beam pattern, create insurance headaches and make you look like a rolling disco. If you want better light, first clean the lenses, fit good standard bulbs and make sure the aim is right. That often does more than a fancy box of bulbs.
Replace in pairs, and keep the old one
If one headlamp bulb has gone, the other is probably not far behind. Replace them as a pair if you can. It keeps the colour match even and saves you doing the job again in three weeks. Keep the working old one as a spare if it is in decent condition. A spare bulb kit in the boot is a very CarBay sort of thing to have, especially in winter.
Also check the number plate lamps. They are tiny, they are easy to forget and they are part of the MOT. Same goes for the high-level brake light on the rear window. Not every car has one, but if yours does, make sure it is doing its bit.
The ten-minute habit that pays you back
Once you have done this walkaround, it gets quicker. You will know which bulbs your car uses, which ones are easy to reach and which ones require a garage to remove half the front end. You will also notice the small changes, like a lens starting to cloud or one indicator looking paler than the rest, before they become a failure or a police officer's favourite conversation.
November is dark enough without adding a dead headlamp to the mix. Ten minutes now, while the car is cold and the kettle is on, is a lot better than discovering the problem on a wet Monday morning when you are already late. Lights are safety kit. Treat them like it.